Using the Consolidated View |
|
Before you begin this task:
For a business process model, the Message Map tab needs to be in focus in order to view the Consolidated view.
The Consolisated view presents a complete view of all message map assignments made for the various activities in a process model.
- From Workspace Documents (Explorer) view, expand <Project> and click
 (<Business Process Model>) to open an existing business process model.
 - Click Message Map tab. The Message Map appears.
- Click Switch to Consolidated View icon at the top left corner of the Message Map window. The Consolidated View of the Message Map appears as shown below displaying all the activities and all assignments.
Note:
The icon ( ) denotes that it is a pre-activity assignment for the activity and the icon (
 ) denotes it as post-activity assignment.
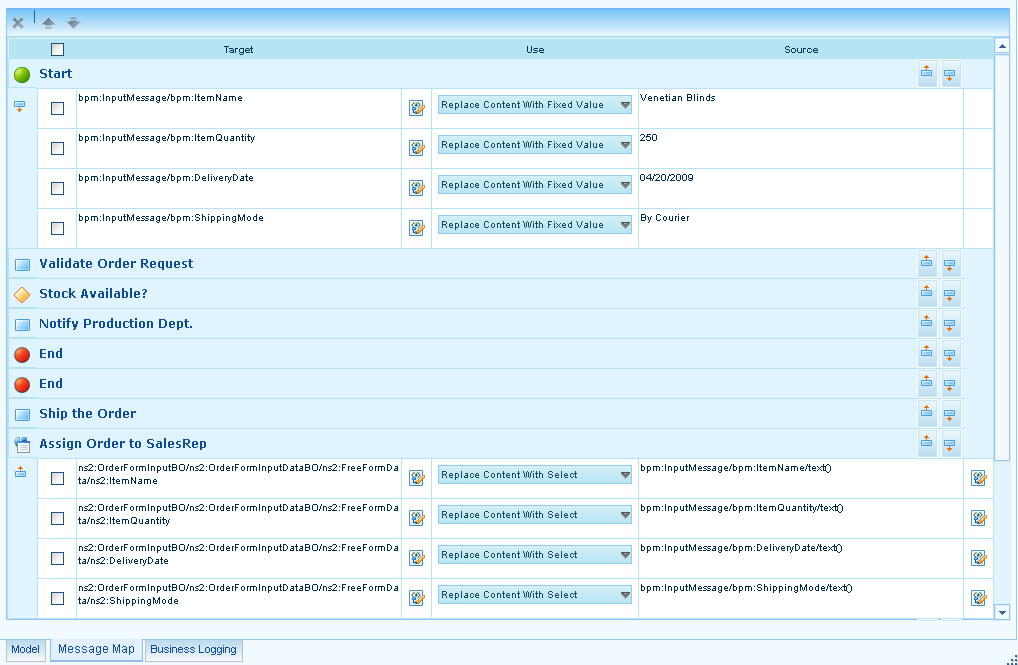
- To change the sequence of the activity in the consolidated view, select the activity and click Move Up (
 ) icon or Move Down (
 ) icon on the toolbar.
 - To create a new pre-activity assignment for a given activity, click in the consolidated view.
- To create a new post-activity assignment for a given activity, click in the consolidated view.
- To reassign or change any of the existing data assignments, select the required operation type from the drop-down list under Use column and change the value in the Source column.
- To search for a given text on any of the assignments in the Source or Target column, follow these steps:
- Click the Search (
 ) icon on the toolbar.
 - Type a value in the Find what: text box and select Find. The search results are highlighted.
- Click the Search (
- To search and replace the given text with a new value, follow these steps
- Click the Search () icon on the toolbar.
- Type a value in the Find what: text box that needs to be replaced.
- Type a value in the Replace with: text box and select Replace. To replace all the instances with new value, click Replace All.
Note:
You can customize your search to look for a given value only in Source or Target assignments by selecting either the Source Assigns or Target Assigns check box. Likewise, you can search only from top by selecting the Up option or from down using the Down option.
- Click the Search (